http://lifehacker.com/5391308/build-a-silent-standalone-xbmc-media-center-on-the-cheap
Build a Silent, Standalone XBMC Media Center On the Cheap
You won't find a better media center than the open-source XBMC, but most people don't have the space or desire to plug a noisy PC into their TV. Instead, I converted a cheap nettop into a standalone XBMC set-top box. Here's how.
In the spirit of our Winter Upgrades theme this week, this guide details how to turn a cheapo nettop (think netbook for the desktop) into a killer settop box running XBMC. It handles virtually any video file I throw at it with ease (including streaming Blu-Ray rips from my desktop), it looks tiny next to my Xbox 360, it's low energy, and it's whisper quiet.
Huge props to this guide on the XBMC forums, which served as the starting point for much of what I did below.
What You'll Need
* Acer AspireRevo: This $200 nettop ships with 1GB of RAM, an Intel Atom 230 processor, 160GB hard drive, Windows XP (which we won't use anyway), and an integrated graphics chip that handles HD video and can output it to HDMI. It also comes with a small wired keyboard and mouse, but once you're done here, you shouldn't need either of them. Oh, and it's tiny. (Other, more powerful nettops will work [like this one's beefier, $330 older sibling], but this is the cheapest one I could find with the NVIDIA ION graphics powerful enough to handle the HD playback.)
* XBMC Live: This is a Live CD version of XBMC that boots directly into XBMC and has a tiny footprint. Basically all you're running is XBMC, so your media center stays light and snappy. You can find the download specifically set up for these NVIDIA ION machines on this page, you can grab the direct download here, or download via BitTorrent here.
* A thumb drive: It doesn't have to be huge, but it'll need to be at least 1500MB of capacity, according to the installer. You should also format it to FAT32.
* An IR receiver/Windows Media Center remote: This isn't strictly necessary, but if you want to control your shiny new XBMC via remote control, you'll need some sort of supported remote with a USB receiver. I bought this $20 remote because it was the cheapest I could find. (Incidentally, it also works like a charm with XBMC as soon as you plug it in.)
Getting XBMC Live up and running on your nettop is a breeze if you follow a few simple steps, so let's get started.
Install XBMC Live on Your Thumb Drive
XBMC Live allows you to try XBMC on any computer from a bootable CD or thumb drive, then optionally install the lightweight, XBMC-focused Linux distro directly to your device if you like. Since our nettop doesn't have a DVD drive, we'll need to first install XBMC to our thumb drive.
(There are ways around this. If you had a USB optical drive, you could probably burn XBMC Live to a disc and go from there. The thumb drive method isn't much more difficult, though.)
Here's how it works:
1. Download the XBMC Live installer with the updated NVIDIA drivers included on this page (direct link, torrent link). Update: Huge thanks to Mike and Aaron for the file hosting and torrent creating. It's a 341MB file, so it may take a while.
2. Burn XBMC Live to a CD
Once the download completes, unzip the xbmc.zip file. What you're left with is an xbmc.iso file—the disc image of the XBMC Live installer. Now you need to burn this ISO to a CD. Install our favorite tool for the job, ImgBurn, then right-click the xbmc.iso file and select Burn using ImgBurn. (If you're running Windows 7, you can use its built-in ISO burner, too, by selecting Burn disc image.)
3. Install XBMC Live to Your Thumb Drive
Now that you've burned XBMC to a CD, you're ready to install it to your thumb drive. To do so, plug in your thumb drive, put the XBMC Live CD in your DVD drive, and reboot your computer. If it's not already your default setting, go into your system BIOS (for most computers hitting Delete at the first boot screen will launch your BIOS) and set your optical drive as the primary boot device.
(All this means is that when your computer boots, it'll first check to see if there's any bootable media in your optical drive. If not, it'll continue booting to your secondary device—generally your hard drive. If your optical drive does contain bootable media—like your XBMC Live CD, for example—it'll boot it up.)
When XBMC Live loads, select "Install XBMCLive to disk (USB or HDD)", then accept the first prompt (by pressing any key). Next you'll end up at the "Choose disk to use" prompt, where you'll tell the installer that you want to install to your USB stick. Be careful here not to choose your hard drive, because it would be happy to overwrite your operating system if you told it to. Remember, your thumb drive is the Removable disk. After you pick the disk you want to use, confirm that you want to proceed and let the installer do its magic. (It'll only take a few minutes.)
Eventually the installer will ask you if you want to create a permanent system storage file, which presumably you'd want if you're not sure whether or not you want to install XBMC Live to your Acer's hard drive. I went ahead and created the system storage (even though we'll install XBMC Live directly to the hard drive in the next step.) Once the installation finishes, you're ready to proceed to the next step.
Set Your System BIOS
You'll need to make a couple of tweaks to your system BIOS to get it working smoothly with XBMC Live. So plug in your thumb drive, boot up your Acer AspireRevo, and hit Delete at the first boot screen to edit your BIOS. Look for the "Boot to RevoBoot" entry in the Advanced BIOS features menu and disable it. While you're there, set your XBMC Live thumb drive as the primary boot device. (You can set the primary boot device back to your hard drive later, after you've installed XBMC Live to your drive.)
Then go to the Advanced Chipset Features menu and set the iGPU Frame Buffer Detect to Manual and set the iGPU Frame Buffer Size to 256MB. (This is detailed here; the actual guide says 512, but that requires that you install more RAM—something I may do in the future, and will detail with a guide if I do. The 512 buffer size will help you stream the larger HD videos without hiccups.)
Now that your BIOS are set, you're ready to try out XBMC Live on your Acer AspireRevo.
Boot Up/Install XBMC Live to Your Hard Drive
At this point, you've got two choices. You can either restart your Acer AspireRevo and boot into XBMC Live to play around a little before you install it to your disk. If you're sure you're ready to install it for reals, just go ahead and run through the exact same installation as you did above, only this time install it to your nettop's hard drive. When you install to the hard drive, you'll also set a system password. This'll come in handy later.
The Final Tweaks
Okay, so far so good. XBMC should boot up directly from your hard drive now, and if you've plugged in your Windows Media Center remote, it should also be working without a hitch. You've just got to make a couple of adjustments to make it shine.
Now, what makes your little nettop work so well is that its onboard graphics processor can handle all the HD business without eating up your regular processor power, so you'll want to enable this in the XBMC settings. So head to Settings > Video > Play, find the Set Render to section, and set it to VDPAU.
Now, depending on how you're planning on hooking up your XBMC Live box to your television, you've got a few more tweaks you'll want to make. Namely this:
If you want to use HDMI for your audio out, head to Settings > System > Audio hardware, then set the audio output to Digital. Set your Audio output device to hdmi, and set the Passthrough output device to hdmi. Last, enable Downmix multichannel audio to stereo.
If you are using HDMI as your audio out (I am, and it's pretty nice), you've got to make one final tweak if you want the audio output to work with menu sounds. (It'll work fine with video without making this tweak, but the click-click sounds that play when you move around the XBMC menu are nice to have.) If that applies to you, create a new text file on your regular old computer (name it asoundrc.txt) and paste the following code (again, this awesome tweak comes from this post):
pcm.!default {
type plug
slave {
pcm "hdmi"
}
}
In the next step, I'll show you how to copy that file over to your nettop (a little trick that'll also come in handy for manually installing plug-ins and copying files to your nettop).
SFTP to Your XBMC Box
If you want to transfer files to your XBMC Live box from another computer, you'll need to get yourself an FTP client (I like FileZilla) and log into your nettop with the password you set when you were installing XBMC Live. To do so, create a new connection in Filezilla that looks something like the screenshot below (the default user is xbmc).
Once you're connected, make sure you're in the /home/xbmc/ directory, then copy over the asoundrc.txt file we made above. (The one you want to use if you're running your audio through the HDMI output.) Once it's copied over, rename the file to .asoundrc, restart XBMC, and the click-click menu sounds should be working along with regular old A/V playback.
The same SFTPing method here will be useful if you ever want to manually install any plug-ins or skins down the road, or just copy over media directly to your nettop's hard drive. (Though we'd recommend streaming—see below.)
Other Options
As I said above, you can buy more expensive, meatier machines, but for my money this Acer nettop has worked perfectly. Apart from upgrading to better equipment, you can also add up to 2GB more RAM if you're up for the job (RAM's so cheap these days, anyway). Like I said, though, so far I haven't seen the need for it.
I also quickly switched the skin to the MediaStream skin, which is the one you see in the photo at the top of the page. For a look at some other great skins you may want to apply to your XBMC box, check out these five beautiful skins—or just head to XBMC's main skins page.
Now that you've got it all set up, you've probably also realized that 160GB isn't all that much space for your media. You'd be right, of course. You've got two pretty good options. First, the nettop should have something like four free USB ports still, so you can easily plug in a big old drive that way. Assuming, however, that you can run an Ethernet wire over to your nettop, your best option is just to connect it to a shared folder on your home network. XBMC works like a charm with Samba shares (Windows shared folders use this).
Whichever method you use, you just need to add your extra hard drive space as a source in XBMC. You can do so through any of the individual menu items (videos, for example), or you can add a default Samba username and password in the settings so it can connect automatically without asking for a password each time you add a new watch folder on that machine.
At this point I could go into more detail on how to use and get the most out of XBMC (it can be a little hard to get your head around at first, even though once you do, it's not actually confusing). We've covered souping up your XBMC—and building your classic Xbox XBMC machine—and both offer some help in those directions. But stick around; tomorrow we'll follow up with an updated guide to some of our favorite XBMC tweaks.
Monday, November 2, 2009
Wednesday, October 14, 2009
How to Make Video Panoramas from Your Digital Camera’s Video Clips
How to Make Video Panoramas from Your Digital Camera’s Video Clips
http://photojojo.com/content/diy/videoramas-stitch-digital-video-panoramas/?page=2
How to Make Video Panoramas from Your Digital Camera’s Video Clips
http://photojojo.com/content/diy/videoramas-stitch-digital-video-panoramas/?page=2
How to Make Video Panoramas from Your Digital Camera’s Video Clips
- Videorama Sample & Introduction
- How to Make Videoramas using Final Cut Pro
- How to Make Videoramas using Flash
This page will show you how you can make a videorama using Final Cut Pro. We also have a tutorial that uses Flash instead.
Before you get started, be sure to take a gander at our sample videorama so you know what we’re making.
What You’ll Need
You’ll need Apple’s Final Cut Pro to follow along. Don’t have it? You can buy it, buddy up with someone who has it, use it at a computer lab, or check out the Flash version of this tutorial.
We’ll be using Final Cut Pro HD 4.5, but if you have a different version the steps should be pretty similar.
Step 1: Shoot Your Videos
To start you’re going to need two or more video clips to stitch together.
When shooting, we recommend using a tripod for best results. Simply point at a scene, record some video, then rotate the tripod a bit — overlapping slightly with your previous shot — and record another cip. You’ll want to capture roughly the same amount of footage with each clip. (For more varied results, leave the tripod at home and just hold the camera.)
In addition to moving the camera left and right, experiment with overlapping up and down as well. You can even try taking your footage at different times of the day; watch time pass as different subjects move from day to night, or record the sun setting through several frames.
If you’re shooting all your videos together, you’ll want to adjust your camera settings so that the videos match nicely. Look for exposure and white balance settings in your video mode and lock them down so they don’t change from video to video. Just as you would when setting up shots for a traditional panorama, remember to consider the scene as a whole and set the exposure for the brightest part of what you’ll shoot.
Check out our panographies tutorial for more tips on shooting for stitching.
Step 2: Setting up Final Cut Pro
 Final Cut has lots (and lots) of windows. To make this tutorial easier to follow, we’re going set it up so that it’s arranged in the same way as you’ll see in the screenshots.
To do this, select “Window” -> “Arrange” -> “Standard” from the menubar.
Standard view should look like this. You’ll have three windows up top: the Browser (where your files are), the Viewer (where you manipulate individual files), and the Canvas (where you manipulate your movie as a whole). Below these three windows is the Timeline where your audio and video tracks will be laid.
Next, start a new project by selecting “File” -> “New Project” from the menubar and save it. (”File” -> Save Project as…”)
Step 3: Importing your videos
 In the Browser window, right click and select “Import” then “Files…”
Browse for the videos you want to stitch together (Shift + click to select multiple) and click “Choose”.
Your videos should now be in the Browser window.
Step 4: Move your videos to the canvas
 Click and drag a video from the Browser window to your Canvas window. When you have your video hovering over the Canvas window a colorful menu with options will appear. Drop the video on the “Superimpose” option. Repeat this for each video clip.
Your videos should now overlap in the Canvas window and in the Timeline window.
Step 5: Arranging Videos
 Now that you’ve got all your videos on the Canvas window, it’s time to arrange them.
From the drop down menu at the top of the Canvas window, select “Image + Wireframe”. This will create a blue outline around your clips. Now you can click and drag them around so that they no longer overlap.
Next, you’ll lower the opacity of your video clips so that they’ll reveal overlapping footage below and are easier to align.
Double-click a video from the Canvas window so that it’ll load in the Viewer window. From the Viewer window, go to the Motion tab (far right) and then lower the opacity settings. We knocked it down to 70 but you can adjust it to whatever you think works best for your videos.
In addition to making our videos easier to align, transparency gives our videorama an interesting ghosting effect. In our example, we’ll leave the videos slightly transparent to preserve it.
Step 6: Making it all fit / Stitching
 Now you’ll need to resize your videos so that they fit in your Sequence.
You can do this either by making the Sequence larger or by making your videos smaller. This all depends on your preference, and for this tutorial we’re actually going to do both.
To make your Sequence larger select “Sequence” -> “Settings…” from the menubar. (If “Settings…” is greyed out and unclickable, click on one of your movies in the Canvas or Timeline and then try again.)
In the Sequence Settings window that appears, you can select a Custom “Aspect Ratio” and then enter your Frame Size. For this example, we’ll use 720×300 for a more rectangular panoramic feel. If you plan on uploading this video to a video sharing site such as Vimeo or You Tube you’ll probably want to stick to a square Sequence.
Now that your Sequence is at its final size, you’ll need to resize your video clips so they’ll fit comfortably inside. To make a video clip smaller, make sure you’re still in “Image + Wireframe” mode and hover the mouse over one of the white corners of a video until the cursor changes to a crosshair. Now you can hold Shift (to maintain your aspect ratio) and drag to shrink your clip.
Go ahead and resize and move your videos around to line them up. (Here’s what ours looked like when we were done).
Step 7: Cleaning up the Timeline
 Since each of your videos will have slightly different durations (you can see this in the Timeline view you’ll need to trim them down to match up.
First, make sure you’re using the Selection tool from the bottom right toolbar. Now click and drag the end of each clip in the timeline to change its duration so they’re all lined up. This will automatically adjust the corresponding audio tracks as well.
Step 8: Audio
 So now your video clips are assembled, lined up, ready to go. What about sound?
If you have only a few videos, the audio tracks shouldn’t be too overwhelming and you could leave them all as-is.
If you have more videos, all those audio tracks playing at once could sound a little confusing. Try whittling down to a few audio tracks you really like. Or, if your audio was mostly ambient noise (as it was in our park example) you could delete all the audio tracks except for one.
To do this, first lock all your video tracks by clicking the little padlock icon. This will prevent them from getting deleted when you delete the video clips’ corresponding audio tracks. Next select the audio tracks you want to get rid of and press the Delete key. Voila!
Step 9: Export and Enjoy!
 Play your video a few times and make sure everything’s lined up and sounds the way you want it to. When you’re sure everything’s good to go, it’s time to share it with the world.
Select “File” -> “Export” -> “Using QuickTime Conversion…” from the menubar. In the window that appears enter a title for your movie and click “Options…”.
In the “Movie Settings” window that appears you can change the settings for how your video will be compressed. You can see the settings we suggest from this screenshot. You’ll want to play around with different compressions and sizes based on where you plan on using your video (smallest for email, small for the internet, large for keeping around for yourself.)
When you’re done changing the settings, click “OK” and then “Save” in the window underneath. Final Cut Pro will render and compress your video.
Congratulations! You just made your first videorama! Groovy.
Photojojo finds the best photo DIY Projects, Tips, and Gear. Subscribe, and we’ll email you our finds twice a week. You’ll be glad you did.
Saturday, September 19, 2009
49 Amazing Resources for Free Vector Graphics
http://speckyboy.com/2009/09/18/49-amazing-resources-for-free-vector-graphics/
49 Amazing Resources for Free Vector Graphics
49 Amazing Resources for Free Vector Graphics
Your search for free Vector graphics is over. Below we have compiled a list of the best free web sites to freely download Vectors, most of the sites don’t qualify into a category, we’ll call them general, but in the second half of the post you will find specialized resources dedicated to vector logos, brands, cartoons and icons.
Vecteezy!

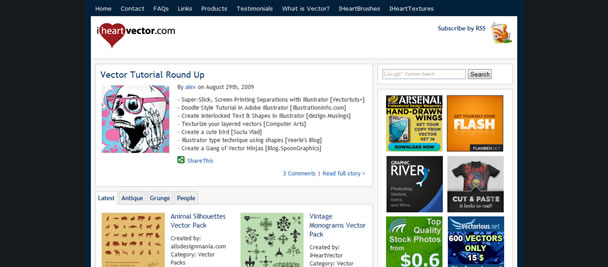
I Heart Vector
QVectors

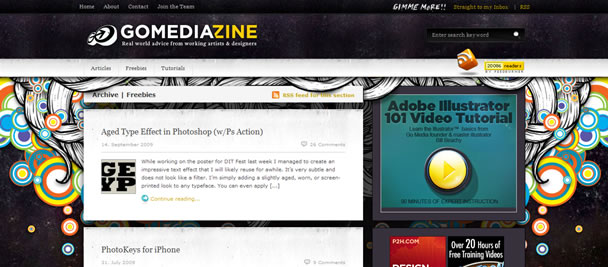
GoMediaZine
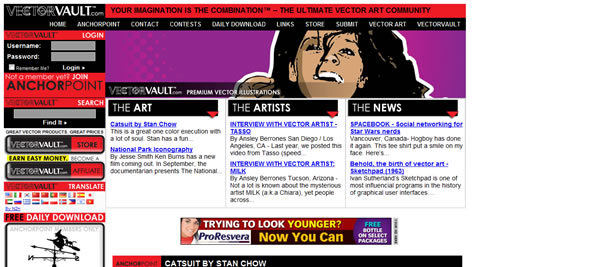
VectorVault
Vector4Free
Open Clip Art Library
CoolVectors

Vector Portal

Vector Art

AI Vault

123 FreeVectors

iDesign * Vectors

DryIcons – Free Vector Graphics

Free Vector Downloads

Vector Lady

Vector Junky

CLD Vectors

123 Vectors

Bittbox

Valley of Vector Resources

VectorJungle

Free Vectors Art Graphics

Vector RSS

VECTORSTUFF.blogspot

Free Design Magazine

Uberpiglet

Free Vectors

Vectordiary

Big Vectors

ZCOOL

Vector Resources on deviantART

VectorStock – Selection of Free Vectors

Vector / Illustrations – Dezignus.com

Webchantier Portail Images Vectorielles

Freebies – Blog.SpoonGraphics

Vector Wallpapers

Best Brands of the World

Vector Logo Database

LogoTypes

LogoZu – Vector Logo Sharing

Seek Logos

Marcas, símbolos y logotipos

Logotypes

LaLogotheque.com

Vector Brand Logotypes

Logotypes.ru

Vector of the World

Vector Cartoons

You might also like…
35 Tutorials to create amazing Vector Graphics using Inkscape »
19 Amazing Free Graphic and Image Editors for Designers and Photographers »
30 Amazing Vector Tutorials from 2009, so far anyway… »
25 Photoshop Tutorials for Creating that Perfect Web Page Design »
19 Tutorials for Creating Beautiful HDR (High Dynamic Range) Imagery »
42 Amazing Photoshop and Illustrator Icon Design Tutorials »
The Top 30 Photoshop Text Effects Tutorials of 2008 – Which is the Best? »
79 Quick Tip Video Tutorials for Photoshop »
30 Amazing Free Vector Icons, Buttons, Stickers, Banners, Labels and Speech Bubbles »
Top 12 Icon Design Video Tutorials »
Top 33 Photoshop Tutorials Resource Sites + RSS Feeds »
11 Amazing Tutorials combining Great Typography and Skillful Vector art »
Subscribe to:
Posts (Atom)
